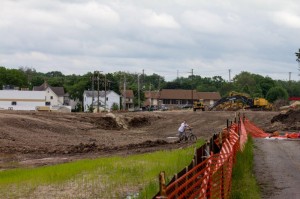
Great River Trail Ride, Wisconsin

I finally had the opportunity to ride the Great River Trail (GRT) in Wisconsin last week and it did turn out to be a pretty “great” ride ~ although it would have been nicer if I had left a little earlier so I did not have to rush so much to try to get back before it got dark.

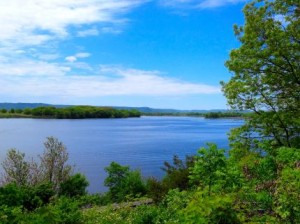
Lake Onalaska from the Great River Trail

Lake Onalaska as seen from the Great River Trail

OK, the “great” in the trail name actually refers to the Great River ~ the Mississippi, of course ~ that flows near or next to the trail in some places. The most scenic part of this trail, in my opinion, is where it runs next to Lake Onalaska which forms the widest part of the Mississippi River.

This trail is 24 miles, one way, and runs from the town of Onalaska (on the southeast end) to the town of Trempealeau and through the Trempealeau Wildlife Refuge (at the northwest end).

I actually started my ride on the Lacrosse River Trail (LRT) in West Salem, Wi. which is about 7 miles east of the GRT. I have wanted to ride all 4 of the bike trails that run from Reedsburg, Wi. to the Trempealeau Wildlife Refuge for a long time now and, with this ride, I have ridden all 4 trails. I have ridden the entire distance of all of these trails now ~ approx. 100 miles at different times ~ with the exception of the Lacrosse River Trail where I only rode the 7 miles on this ride to get to the GRT.

You can get the details, maps and first hand ride photos of all 4 of these west central Wisconsin Trails from our Wisconsin bike trail articles on any one of these trails.

For example, see The Great River Trail home page (here) for the latest updates and photos on this trail and/or maps and descriptions of the other 3 connecting trails that make up this 100 mile route through west central Wisconsin.

A cyclist and friend of mine had ridden, photographed and written about the Great River Trail back in the Fall of 2006. You can find his ride story and photos along with the latest photos and updates from my recent ride via the Great River Trail link above.

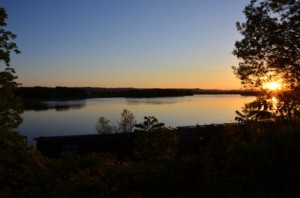
Lake Onalaska at sunset

Lake Onalaska near sunset

I enjoyed my ride on the Great River Trail last week although, as I mentioned above, I did not leave quite enough time to ride the distance that I had planned (64 miles both ways) and I had to rush more than I would have liked and ended up riding the last 5 miles or so in the dark (with no bike light, of course)

Fortunately, the trail itself was in great shape (very flat and well groomed) and was straight and flat so it was not as bad as riding a poorly maintained or more difficult trail in the dark.

I have included photos in this blog post of Lake Onalaska from early afternoon and at sunset from the pictures that I took on this ride. It can be a little difficult getting early evening photos of Lake Onalaska from the trail since you are looking west and right into the sun.

For a more detailed update and/or for the full Photo Tour of this ride see the Great River Trail link above or see The Great River Trail Photo Page 3 (here) to go directly to the photos from this May, 2014 ride.

New Bridge on West End of Busse Woods Trail

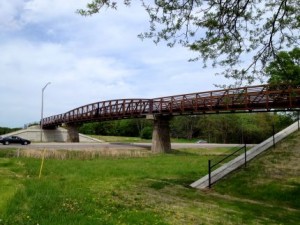
Finally! We have a New Bridge over Higgins Road (Route 72) on the west end of the Busse Woods Trail (BWT). I first noticed the bridge ~ from Higgins Road below ~ this past December (2013) but I had not ridden the trail yet this year.

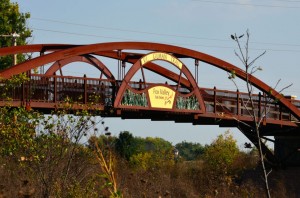
New Busse Woods Bridge

New Bridge Over Higgins Road for Busse Woods Trail

I also know that the bridge was not in place in August of 2013 when I took the BWT to the last Tour of Elk Grove ~ which, by the way, sadly probably was the actual “last” Tour of Elk Grove which I will cover in a future blog post soon.

The New Bridge on the west end of the red trail is a huge improvement in the Busse Woods Trail system. I always hated the busy road crossing at Higgins Road and the expressway entrance and exit ramps. There were lights, painted pedestrian crossings  and crossing signals but this was still a fast and busy and dangerous intersection where you needed to cross at least 6 lanes of traffic. On top of that, you would almost always have to stop and wait for the signals to cross which would break up the momentum of your ride.

Well, now you can ride the entire Busse Woods Red Trail loop, on both sides of Higgins Road, almost non-stop (on a good day anyway). There are actually 2 bridges over Higgins Road now. The bridge on the east end of the Red Trail, by Arlington Heights Road, has been there for many years now. Having both bridges now is just a great improvement to this trail system.

So this past week, I finally had a chance to ride the Busse Woods Trail with the new bridge ~ and it was excellent, of course. Being May, the newly planted grass, had not fully come in and was still mostly brown but I did manage to photograph the new bridge and update the Busse Woods Trail pages on this website and include a New Photo Page with photos of the new bridge.

You can find the original Busse Woods Trail pages here. The original photo pages were from fall of 2005 so there are a few photos of how the old trail section and crossing looked before the new bridge.

Then I have included photos of the New Busse Woods Bridge here.

I have also included my GPS ride data and Map of the Red Trail here (on the Garmin Connect site) now that I have my GPS bike computer (Garmin Edge 800) and can capture my ride data.

Finally, if you prefer a video, you can see my original video of the entire Busse Woods Trail (prior to the new bridge) here on YouTube. The video was done with an old camcorder so the quality is not great and the audio was done with some now obsolete recording equipment so it’s quality is also not great BUT on the other hand it does include the ENTIRE TRAIL and the sound track is original :-).

The video is 14 minutes and 45 seconds and the old Higgins Road crossing is brief and at the 6 minute marker.

Coming Soon… I will be posting an update on the Tour of Elk Grove status soon and I just returned from a trip to Wisconsin where I had a chance to ride the Lacrosse River and Great River Trails. Of course I have photos and will post an entire update as soon as it is completed so stop back soon…

Millennium Trail Connection to North Shore Bike Path

I have ridden most parts of the Millennium Trail (MT) and the North Shore Bike Path (NSBP) in the past but had never ridden the far eastern part of the MT or the far western part of the NSBP and since both parts of these trails run parallel to Route 176 I was curious if the 2 trails connected to each other. Millennium Trail East near Route 176

First, I researched this on Google Maps, which is a great way to check out trail connections or new trails and new bike routes. You can start out with Map View and zoom in to where you are planning your ride then check out the actual terrain with Satellite View or zoom in further for the Street View if it is available. Google does not have all of the smaller trails listed in their mapped areas but they do have most of the longer trails.

Anyway, I found that the 2 trails do NOT connect directly to each other but you can take the MT east to Midlothian Road then ride alongside Hawley Street on the sidewalks (or on the street if you don’t mind riding in traffic) to get to the NSBP at Carmel Catholic HS.

You can get a good idea about the routes on Google Maps but I wanted to see what it was like first hand so I headed out to the Country Bumpkin Nursery ~ at Gilmer Road and 176, which is where I wanted to start my trip east ~ to check it out this trail connection.

My experience on this ride was that the eastern part of the MT was not all that great but it was paved and straight so you could go fairly fast if you like, the trip through Mundelein on the sidewalks pretty much sucked and the western part of the NSBP was actually pretty nice.

I also did a short ride on the Des Plaines River Trail (DPRT) when I got to it from the NSBP. The DPRT is actually one of my favorite trails in the area.

So in addition to this blog post, I wrote up the details on this ride along with photos and the GPS Maps of the rides on the following pages: Millennium Trail Connection to North Shore Bike Path and the NSBP West End Photo Page.

So many trails… so little time…

McHenry County Prairie Trail Detour Update

I just received the following update on the McHenry County Prairie Trail construction and detour from the McHenry County Conservation District .

Bridge on Prairie Trail

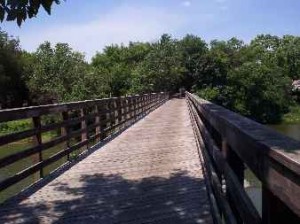
Bridge over Fox River on Prairie Trail

A detour is in place and signs are posted through the Algonquin Bypass Area.  (From the ramp in Algonquin you head NE on Harrison and take a left on Washington; the signs then guide you left along Route 31/Main St. back to the trail to head north.)

I haven’t been on this trail yet this year myself but the detour would be just after you cross the Fox River heading north into Algonquin.

Just an fyi, for those of you who may not be that familiar with this trail, the McHenry County Prairie Trail is the trail that connects to the northern end of the Fox River Trail in Algonquin and continues north to Genoa City, Wisconsin.

You can actually ride these 2 trails from Oswego, Illinois to Genoa City, Wisconsin! There are a few breaks in the trail ~ like going through Aurora ~ and there is construction occasionally ~ as described above ~ but you can ride these trails all day if you want to.

I have actually ridden the entire distance of both of these trails but on multiple rides. I did do a 100 mile ride one time taking the Fox River Trail north from Geneva, Il then connecting to and riding the Prairie Trail north to Genoa City, Wisconsin then back to Geneva. Most parts of both of these trails are paved too.

Anyway, the update above is the latest info that I have on the Prairie Trail.

First Rides, Trail Signals and Trail Conditions

Yep, riding season has arrived here in Chicagoland! I normally get my first rides of the season in a little sooner than I did this year but I finally got my first ride of the year  last week. I was still doing my walking and running routine when the weather first started improving this year.

I usually consider riding season to start and stop pretty close to daylight savings time but this year I think there was still snow on the trails when we started daylight savings time. Anyway, it really felt good to get back in the saddle and out on the trails again.

One thing that I noticed as being very helpful this year as a walker/runner and bike rider is to not only signal your intentions ~ like letting other people on the trail know that you are coming up behind them and passing ~ but also to acknowledge that you heard the rider that is about to pass you.

For example: When a rider comes up behind me ~ when I am walking or jogging ~ and either says the old standard “on your left” or has a bell or horn or something (I prefer and have a bell myself) is to just give a thumbs up, as you continue walking or whatever, or even to just say OK or something similar just to let them know that you heard them.

I find this really helpful as a rider because I know that the person or people ahead of me heard me. I usually thank them for that simple gesture and I have found other people usually thank me when I acknowledge their passing intentions too.

Of course there are always the riders that are completely silent and stealthy and speed up behind you and scare the sh** out of you when they are right next to you and passing but then there will always be all kinds of riders out there. I think a little common sense and courtesy goes a long way to make the trails safer and more fun for everyone.

Paul Douglas Woods Trail

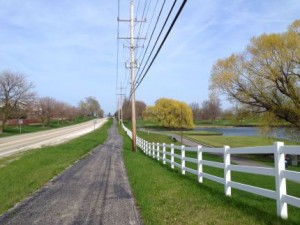
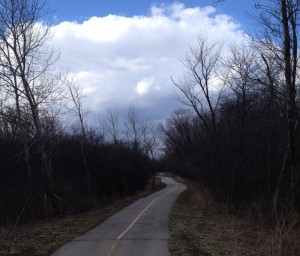
Paul Douglas Trail along Huntington, Freeman

Regarding the Trail Conditions. My first few rides were on the bike trail that goes around Paul Douglas Forest Preserve in Hoffman Estates. Even though this is a very specific trail, I think that many of the trails in the Chicagoland area ~ and maybe even in Northern Illinois ~ may have similar conditions due to the long, hard winter that we have had this year.

I rode the trail around the entire Paul Douglas forest preserve and there were no detours or obstructions.

What I did find, however, is that any place where the trail was very close to a road, the trail was covered with stones and small pieces of asphalt. I assume that this is from the snowplows pushing snow off of the roads and on to the trails throughout this long winter.

I have never seen this situation quite as bad as it is this year. It is all passable but it looks like it would be easy to get a flat in these places or even slip on the loose stones and stuff. I’d like to see the people that maintain these trails to just get out there and clean this up a little. I don’t think it would take that much effort.

Anyway, once again, it is still great to get out and ride again. I will try to keep the updates coming a little more regularly now.

Later, Rob.


Virgil Gilman Trail Ride

Last week a friend and I packed up our bikes and cameras and made it out to another bike trail that neither one of us had ridden before. This was the Virgil Gilman Trail (VGT) that runs northeast from Aurora to Waubonsee College in Sugar Grove.

Bridge on Virgil Gilman Trail

The Bridge over Galena Avenue on the Virgil Gilman Trail

I had ridden past this trail a few other times when I was on the southern end of the Fox River Trail (FRT) but never had a chance to check out the entire trail. For this trip we actually started on the Fox River Trail in Oswego then headed north to the Virgil Gilman Trail which is about 5 miles from Oswego on the trail. This gave us a little less than a 40 mile ride ~ round trip ~ which is pretty good for these shorter days.

I was hoping to catch some good fall colors out on this trail, since it has some nice wooded areas, but the trees had not really started to show their colors yet this year ~ in this location anyway. Even without the full fall colors we were still able to find enough nice scenery and photo ops for a good photo tour of this trail.

See: The Virgil Gilman Trail ride report and photo tour for more information on the trail and for the photos from this ride.

I liked the northwestern part of this trail the best (west of Aurora). This part of the trail was very wooded with tall trees in some parts and also had some interesting looking bridges I thought.

The northwestern end of the trail is at Waubonsee Community College which was a nice place for a break before we turned around and headed back. On a lot of the other trails that I have been on the best place for a break is sometimes an opening in the woods or if you are lucky you can find a bench or picnic table.

It would have been nice to ride the Fox River Trail north of Aurora on this ride too but there is only so much daylight these days and you need to get through Aurora to hook up with the northern part of the FRT.

I have included a lot more information on this trail on the VGT trail page on this website and in the photo pages so check out the Virgil Gilman Trail Pages here when you get a chance.

Badger State Trail Ride and Photos

I had planned to ride the Badger State Trail in Wisconsin since spring of this year but was unable to get out to this trail until last week. Well, I finally rode the trail from Monroe, Wisconsin, through the tunnel and into Belleville.

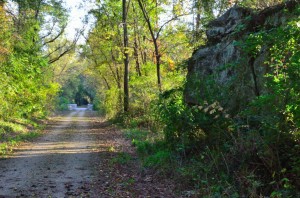
Badger State Trail, Rock wall and bridge

Rock Wall and Bridge on the Badger State Trail

I had originally ridden the southern part of this trail a few years back when a friend and I rode the Jane Addams Trail which runs from Freeport to the Illinois/Wisconsin border and then connects to the Badger State Trail. We rode the JAT from Freeport, Il to Monroe, Wi on that trip so I continued my ride this year heading north from Monroe, Wi.

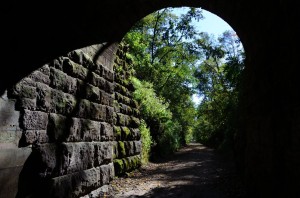
The Badger State Trail (BST) is a nice, scenic, rural Wisconsin trail but the highlight of this trail is definitely the 1/4 Mile Long Tunnel which is located about 4 miles south of Belleville.

Badger State Trail Tunnel Looking Out

Looking out of the southern entrance of the tunnel.

I took quite a few photos, as usual, to document the trail and give you a feel for what it is like, but I probably took more photos of the tunnel since that is the more unique features of this trail.

The only other trail that I have ridden with tunnels like this is the Elroy-Sparta Trail, which has 3 tunnels. The Tunnel on the BST is more like Tunnel #3 on the EST (which is the one that is closest to Sparta) since both of these tunnels are fairly long and you can’t see the exits at either end when you are in the middle of either tunnel.

You will need a light with you to pass through the tunnel (or at least a stick like a blind person would use, but I would recommend a light). I had a bike light with me although I did not have the handlebar clip attached so I had to hold it as I rode.

When I passed through the tunnel there was a young family passing through also and they all had helmet lights on (like coal miners on bikes!). Later on there was a guy that came through the tunnel using the flashlight app on his iPhone. I tried that on my way back but it was not a good as my bike light.

I actually ended up taking more photos from inside the tunnel, looking out, rather than outside the tunnel. This can be a little tricky due to the light (or lack of light) but it can also produce some fairly unique situations and photos.

Of course, I have uploaded a batch of the photos that I took on my ride and have documented the trail and my specific ride on the Badger State Trail.

Check out The Badger State Trail Photos and Ride Report HERE.

I have also included the GPS Map and data from my bike computer on these pages.

2013 Tour of Elk Grove, Photos and Ride Story

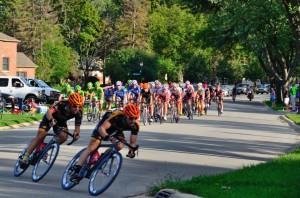
Well, the Tour of Elk Grove (TOEG) professional, intermediate and entry level bike races have come and gone once again until next year. I was a little disappointed this year that, personally, I was only able to make it to one race ~ the  Prologis Pro Men Road Race (Stage 2) which was held on Saturday, August 3rd.

Tour of Elk Grove Sharp Turn

Tour of Elk Grove, Sharp Turn off Ridge Road

For those of you who may not be familiar with this event, it is a 3 day cycling race event, In Elk Grove Village, Illinois, that includes professional riders from around the world competing for large cash prizes along with intermediate races, amateur races and even a Big Wheel Race for the kids (along with quite a few other activities). The race is held on a Friday, Saturday and Sunday at the beginning of August (this year’s race was August 2-4).

I have included more information on the event, plenty of photos ~ and a link to the official Tour Of Elk Grove website ~ on our main Tour of Elk Grove page here.

I was actually able to attend all 3 days of the event last year (2012) but, as I mentioned above, I was only able to make it to one race this year :-(. I did however bring my camera, of course, took quite a few photos and have selected and posted the 2013 Tour of Elk Grove Photos here.

I think that this is a really fun and interesting event for anyone into biking (not just racers) as well as people who may not even be into biking all that much (I guess there are people like that out there 🙂 ). There is a lot going on, plenty of interesting people and the races can be pretty entertaining and exciting.

The other thing that I like about the races is that they are a Great Photo Op. Lots of action and colorful scenes. Both years that I attended this event, I have met and talked with other photographers (it’s a very casual environment). In some cases, the other photographers have attended the TOEG for multiple years and have given me some very helpful photography hints.

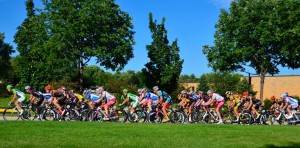
Wide-Angle view of bike race

Wide-Angle view of Tour of Elk Grove Racers

I probably shouldn’t even mention this, because I would still like people to check out the 2013 TOEG photos that I linked to above and I think some of them came out pretty well, but I actually screwed up a little on one thing this year. I used Aperture Priority for all of my photos this year instead of using Shutter Priority with a faster shutter speed (or even the pre-programmed sports mode) for the action shots.

I think I was more focused last year 🙂 and I used the faster shutter speeds for most of the shots. This year, I guess I just wasn’t using my brain cell. Like I say, I still did get some good shots so please check out the 2013 photos if you get a chance.


As for the Ride Story part of this post, one of the reasons that I was not able to attend all 3 days and more of the races, as I did last year, was because we are sharing our vehicles more this year and I was not able to use our van to drive my bike to the TOEG and leave it parked there all 3 days so I ended up riding to and from the TOEG on my bike.

As I mentioned in my previous post, I used Google Maps to help me check out my route ahead of time and it actually worked out very well. I knew that there were bike trails, sidewalks along the busier roads that I needed to take and ways to get over or under the interstates that I needed to cross. The place that I thought would be the most difficult (near Woodfield shopping mall) was the most difficult, as expected, but I still managed to find a pretty safe route past that location.

Once I past Woodfield, I took the bike trail that goes under route 53 (or Interstate 290) and right to the Busse Woods Bike Trail. I then took the bike trail through the southern part of Busse Woods (by all the lakes) and up to Arlington Heights Road where I crossed and was right at the Tour of Elk Grove.

My entire ride, to and from the TOEG and my ride at the TOEG, was only a little over 22 miles but it still takes more time to get there and get back then when you are able to drive there.

I am a little bit of a stats nerd and I just checked my mileage on the Garmin site. I see that my mileage at the Tour of Elk Grove (not counting getting there and back) was 3.4 miles. This brings up the next topic that I also wanted to mention.

I have found it to be very convenient to have my bike at the TOEG (rather than having to walk everywhere when I am there). I tried to get photos at a number of different locations this year and having my bike made it possible to get to and photograph the race in different places.

I also wanted to mention that the Tour of Elk Grove is televised locally on Comcast Sports Network (CSN Chicago) about a month later so it should be on at the beginning of September.

OK, that’s about it for now. I hope some of you who live in the area were able to make it out to the Tour this year. If not, maybe we’ll see you there next year.

Later, Rob.

Bike Trail and Route Mapping with Google Maps

I am sure that many of you are already aware of this but I wanted to mention a very handy tool that I have been using lately for planning my bike rides ~ either on bike trails, road trips or around town.

What I am referring to is, of course, Google Maps in combination with their zoom and  Street View options. Google has put a lot of resources into their mapping applications and they are really quite advanced and useful at this time, especially for bike trails and routes.
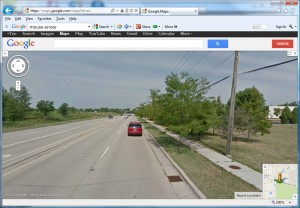
Google Street View

Google Street View
© 2013 Google

I still use hard copy and PDF maps to find new trails that I may want to ride and I also have my Bike GPS computer (with mapping) for reviewing where I have been (and for a little help when I am out riding) but I have been using Google Maps more and more for checking out the bike trails that I am going to ride (or have already ridden).

The reason that this subject came up again for me is because we are having some problems with our vehicles and I have been using my bike more for trips around town and may need to ride to the Tour of Elk Grove (TOEG, that I mentioned in the post below) this weekend.

I already know of a lot of good routes and connecting bike trails for trips around town but there are times that I may need to go somewhere different or a little farther (like the TOEG) and it is nice to zoom in and especially to use the Street View option to check out what the roads or trails actually look like. You also have the satellite view to check out the terrain and surroundings.

If you live in populated areas that Google has photographed then you can get the Street View for the entire trip. For bike trails and routes in less populated area you can still follow the routes and zoom in for quite a bit of detail and Google includes many major bike trails.

Anyway, for my latest situation, I was planning a ride from Palatine, Il to Elk Grove Village, Il and there are busy roads and expressways to deal with. What I found out (via Google Maps) is that I can use a combination of bike trails and sidewalks, that run alongside a few major roads, for the entire trip. I was also able to verify that there was a sidewalk over Interstate 90 (where I wanted to cross) and a way to get under route 53 in a few locations and I could see how wide the underpasses were.

I don’t like riding on major roads or highways in this area and prefer the sidewalks myself if there is no other good option. The problem on longer trips is that you often run into a gap somewhere where there is no trail or sidewalk and only a narrow road without much of a shoulder and cars zipping by at high speeds (that’s not my idea of fun (or even of good survival!)).

With Google Maps and the Street View option, I was able to Virtually Ride my entire planned route on my PC before getting out there and taking chances or risking my life on dangerous roads.

Hints for Using Google Maps and Street View for Bike Routes

For those of you who are already proficient with Google Maps you may want to skip this part although there still may be something helpful here.

The real keys to using Google Maps and Street View for your bike routes is in zooming in to the correct level and selecting Street View when you have the option and when you need to see the actual surroundings.

Step One, of course, is to go to Google Maps. For this, just go to Google and click on MAPS at the top of the page.

Step Two is to find the bike trail that you are looking for or the route that you are planning to take. This is basically just typical search queries.

For popular bike trails, you can often enter the bike trail name in the Google search box to get to the trail. For trails and routes in a specific area, just search for the town (or other more specific location) in the search box. For a route between 2 locations just select Get Directions and enter the 2 locations. This will give you driving directions on the road but it can be a good starting point for finding the best bike route.

The Final Step is to zoom in to see the local roads and bike routes. You may need to zoom in as far as you can before the bike routes appear or sometimes you can see the bike trails zoomed out a little in order to get a bigger view. For a longer ride you will probably need to zoom in and out many times as needed.

To see the Street View or Photos of a Location, you can select the little orange man (icon) that is above the zoom bar and drag it to the map area (or if you zoom in as far as you can and if there is a street view available it will also appear that way). Once you are in Street View you can navigate through your route or get a 360 degree view of the area. For those of you who are familiar with this feature, you know how cool this is!

If you are in a less populated area that does not have Street View available, you can still zoom in as far as you can and usually see the bike trails and local streets and there are often individual photos posted to view the area. To see if there are photos available select the little orange man process (described above) once again. These can give you a visual look at the area but they do not give you as much detail as the actual Street View option.

In some cases, you may need to switch to Satellite View and zoom in as far as you can to get a good look at the area. Satellite View also gives you much more detail in more populated areas but hopefully this will keep improving and maybe at some point we’ll have good satellite views and street views of the smallest country roads.

At any rate, I have found Google Maps to be extremely helpful for finding, reviewing and planning bike routes and rides and I hope that the info above may help some of you also.

For more info, photos and videos or many of the bike trails in the Chicagoland area, see our popular Bike Trails pages and as I’ve said for so many years, Enjoy the Ride(s).

McHenry County Prairie Trail Construction and Bridge Out

Just a quick update to let you know about some construction on the southern end of the McHenry County Prairie Trail, just north of where it connects to the Fox River Trail (in Algonquin).

This update and the photos are from my friend and fellow cyclist Dale Kiffel (I have not been on the Fox River Trail or Prairie Trail myself yet this year).

New Bridge on Prairie Trail

New bridge being built 3/4 mile north of Algonquin Road.

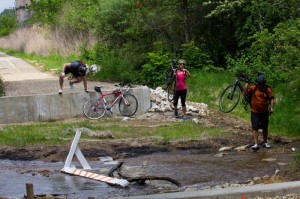
The main obstacles on this trail right now are where the trail crosses route 31 in Algonquin (there is some major construction going on there) and where they are building a new bridge about 3/4 of a mile north of the Algonquin Road overpass.

The first photo on this page is where they are building the new bridge. The trail is closed but, as you see by the determined cyclists in the photo, it is possible to get to the other side if you are determined.

The second photo in this post is the construction at Route 31 in Algonquin. It looks like it could be difficult to get through here too but there is also a cyclist getting through this section too.

Prairie Trail Construction

McHenry County Prairie Trail construction at Route 31 in Algonquin.

So if you are planning a trip on the northern end of the Fox River Trail and connecting to the Prairie Trail to continue north (or planning a ride the other way on the trail) be aware that you may not be able to get through or there may be some tricky obstacles or detours that you will need to take.